DIY Smart Home Projects: Budget-Friendly Automation Ideas
Smart home technology has evolved from expensive luxury items to accessible, budget-friendly solutions that anyone can install. Today’s homeowners don’t need to spend thousands of dollars or hire professional installers to enjoy the convenience, security, and energy savings that home automation provides. With the right approach and some basic DIY skills, transforming a traditional home into a smart, connected living space becomes an achievable weekend project.
The democratization of smart home technology has opened doors for creative homeowners who want to enhance their living spaces without breaking the bank. Major retailers now stock affordable smart devices that work seamlessly together, while online tutorials and communities provide step-by-step guidance for installation and setup. The key to successful DIY smart home implementation lies in starting small, choosing compatible devices, and building the system gradually over time.
Modern smart home devices offer plug-and-play simplicity that eliminates the need for complex wiring or professional installation. Most systems connect through existing WiFi networks, while others use low-power protocols like Zigbee or Z-Wave that create mesh networks throughout the home. These technologies allow devices to communicate with each other and respond to user commands through smartphone apps or voice assistants.
Smart Home Adoption Statistics
of homeowners plan to add smart devices
average cost to start a smart home system
reduction in energy bills with smart devices
of DIY smart home projects completed successfully
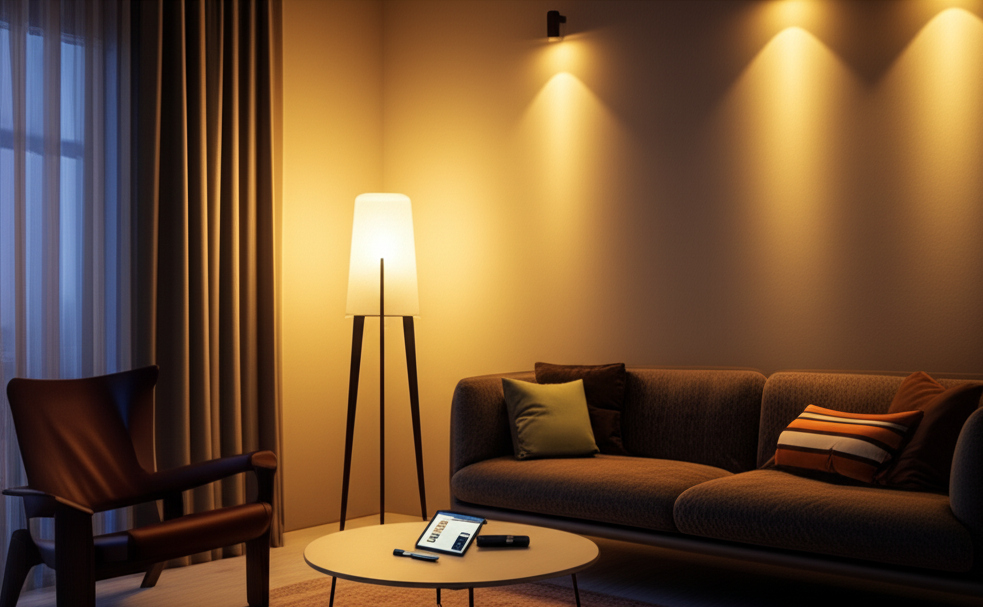
1. Smart Lighting Control System
EasySmart lighting represents the perfect entry point for DIY home automation enthusiasts. These systems offer immediate benefits in terms of convenience, energy savings, and security while requiring minimal technical expertise to install and configure. Modern smart bulbs and switches can be controlled remotely, programmed to follow schedules, and integrated with other smart home devices to create sophisticated lighting scenes.
The transformation begins with replacing traditional light bulbs with smart LED alternatives that connect directly to home WiFi networks. These bulbs offer features like dimming control, color temperature adjustment, and scheduling capabilities that work through dedicated smartphone apps. More advanced users can install smart wall switches that control entire lighting circuits while maintaining compatibility with existing fixtures.
Essential Components and Setup
A comprehensive smart lighting system starts with a central hub or controller that manages all connected devices. Popular options include dedicated lighting hubs from manufacturers like Philips Hue or Lutron, or multi-protocol hubs like SmartThings that support various device types. The hub connects to the home’s internet router and serves as the communication bridge between smart devices and user control applications.
Smart Bulbs (4-pack)
$45-80LED bulbs with WiFi connectivity, dimming, and color options
Smart Switch
$15-35Wall switch replacement with app control and scheduling
Motion Sensors
$20-40Automatic lighting activation for convenience and security
Smart Hub
$50-100Central controller for device coordination and advanced features
Installation typically involves replacing existing light bulbs with smart alternatives and downloading the manufacturer’s app to begin setup. Most smart bulbs enter pairing mode automatically when first powered on, making them discoverable by the control app. Users simply follow the app’s prompts to connect each bulb to their home network and assign them to specific rooms or groups.
Installation Steps
Plan Your Layout
Map out which lights you want to automate first, focusing on high-traffic areas like living rooms, bedrooms, and entryways that benefit most from smart control.
Install Smart Bulbs
Replace existing bulbs with smart alternatives, ensuring the power is off during installation. Most smart bulbs fit standard light fixtures without modification.
Download and Setup App
Install the manufacturer’s app on your smartphone and create an account. Follow the setup wizard to connect the app to your home WiFi network.
Pair Devices
Use the app to discover and connect each smart bulb to your network. Assign descriptive names and organize bulbs into rooms or groups for easier control.
Create Automation Rules
Set up schedules, scenes, and automation rules that automatically adjust lighting based on time of day, occupancy, or other triggers.
Advanced features include geofencing capabilities that automatically turn lights on when residents arrive home and off when everyone leaves. Integration with voice assistants like Amazon Alexa or Google Assistant enables hands-free control through simple voice commands. Some systems also offer vacation modes that randomly turn lights on and off to simulate occupancy while homeowners are away.
Safety Considerations
Always turn off power at the circuit breaker before installing smart switches. If you’re not comfortable working with electrical wiring, consider using smart plugs or bulbs instead of hardwired switches, or consult a qualified electrician for installation.
2. DIY Security Camera Network
MediumCreating a comprehensive home security camera system has become increasingly affordable and accessible thanks to wireless technology and cloud storage solutions. Modern DIY security cameras offer professional-grade features like high-definition video recording, night vision, motion detection, and smartphone notifications at prices that make comprehensive coverage possible for most budgets.
The flexibility of wireless camera systems allows homeowners to position cameras exactly where needed without running cables or drilling holes. Battery-powered options provide complete installation freedom, while solar charging accessories ensure continuous operation without regular maintenance. Cloud storage services automatically backup recorded footage, providing secure access to video evidence even if cameras are damaged or stolen.
Camera Types and Placement Strategy
Effective security camera placement requires strategic thinking about potential entry points, high-value areas, and camera field of view. Outdoor cameras should monitor driveways, front and back doors, and any ground-level windows that could provide unauthorized access. Indoor cameras work well in main living areas, but privacy considerations make them less suitable for bedrooms and bathrooms.
| Camera Type | Best Applications | Key Features | Price Range | Installation Difficulty |
|---|---|---|---|---|
| Wireless Indoor | Living rooms, kitchens, hallways | HD video, motion alerts, two-way audio | $25-80 | Very Easy |
| Battery Outdoor | Entryways, driveways, yards | Weather-resistant, night vision, PIR sensors | $60-150 | Easy |
| Wired Outdoor | Permanent monitoring locations | Continuous power, higher resolution, PoE | $80-200 | Moderate |
| Doorbell Camera | Front door monitoring | Visitor interaction, package detection | $100-250 | Moderate |
Camera resolution has improved dramatically in recent years, with many budget models now offering 1080p or even 4K recording capabilities. Higher resolution provides clearer images for identification purposes but requires more storage space and bandwidth. Most systems allow users to adjust recording quality based on their specific needs and internet connection capabilities.
Motion detection algorithms have become increasingly sophisticated, reducing false alerts while improving detection accuracy. Advanced cameras can distinguish between people, animals, and vehicles, sending customized notifications based on the type of motion detected. Some models include facial recognition capabilities that can identify known individuals and alert homeowners to unfamiliar visitors.
Required Tools and Materials
Basic Tools
- Drill with bits
- Screwdriver set
- Level
- Measuring tape
- Stud finder
Installation Materials
- Mounting brackets
- Screws and anchors
- Weatherproof cables (if needed)
- Cable conduit
- Silicone sealant
Network Equipment
- WiFi router with good range
- Network switch (for wired cameras)
- PoE injector (if needed)
- Ethernet cables
- WiFi extender (if needed)
Professional installation typically costs $200-500 per camera, making DIY installation extremely cost-effective for multi-camera systems. Most wireless cameras can be installed in under an hour, while wired cameras may require additional time for cable routing and network configuration. The investment in DIY installation pays dividends through both immediate cost savings and the ability to easily relocate or upgrade cameras as needs change.
Cloud storage subscriptions typically cost $3-10 per month per camera, depending on storage duration and video quality. Some manufacturers offer free basic plans with limited storage